If you want to get your company logo or custom design stitched on t-shirts, caps, or jackets, you’ll need to digitize your logo for embroidery first.
At Embro Prints, we help customers like you turn your logos into beautiful stitched designs using our professional embroidery machines and digitizing software. Whether it’s for business branding, corporate uniforms, or personalized gifts, understanding the embroidery digitizing process will help you get the best results.
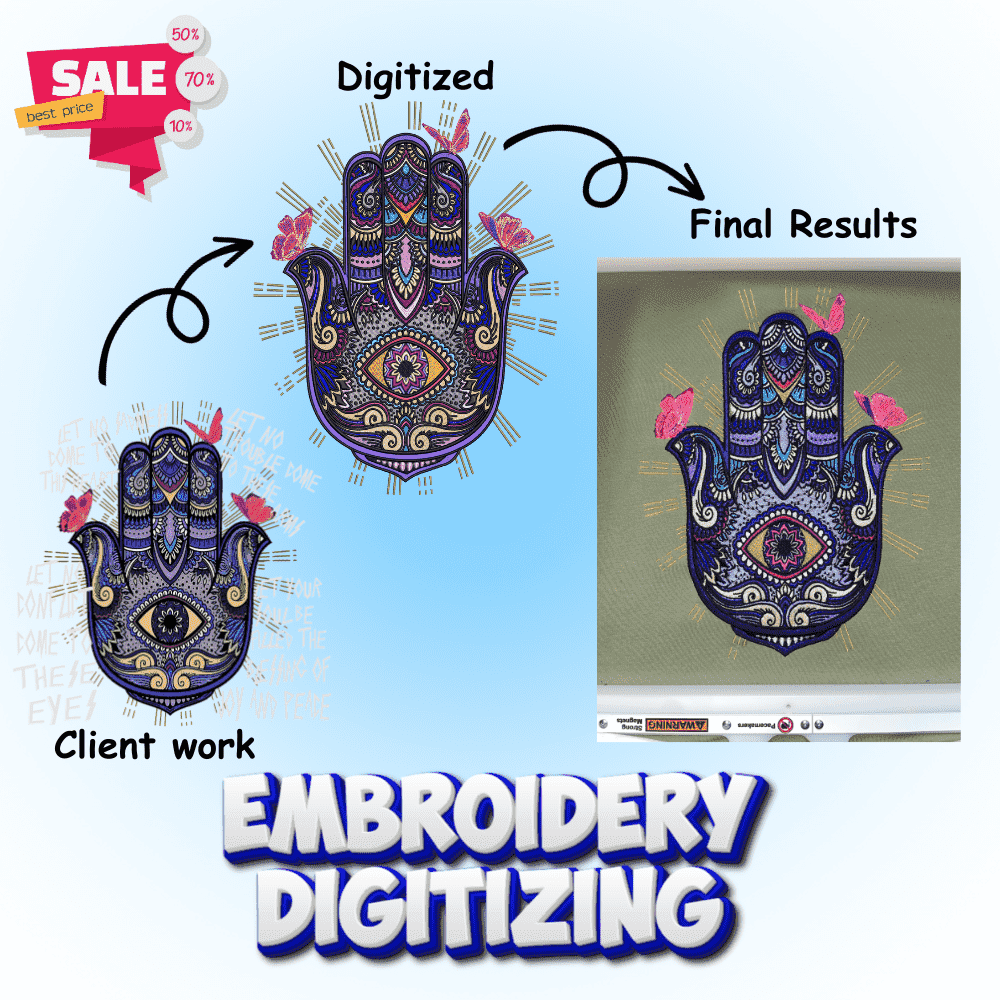
What Is Digitizing in Embroidery?
Before we talk about how to digitize, let’s understand what embroidery digitizing actually means.
In simple terms, digitizing in embroidery means converting a normal image (like a logo or design) into a special embroidery file format that an embroidery machine can read.
The machine doesn’t understand pictures like JPG or PNG. It needs a machine-readable embroidery file that tells it where to place each stitch, what direction to move, and what colors to use.
This special file is made by a person called a professional digitizer and the process is known as embroidery digitizing or logo digitizing.At Embro Prints, we use modern commercial embroidery machines and experienced digitizers to make sure your logo is perfectly converted and stitched on your chosen fabric.
Why Digitizing a Logo Is Important
If your logo is not properly digitized, your custom embroidery won’t look right.
Here’s why good digitizing matters:
✅ It keeps your logo embroidery sharp, clear, and readable.
✅ It prevents messy stitches or uneven designs.
✅ It ensures that your logo looks great on any fabric ,shirts, caps, or jackets.
✅ It helps the machine understand stitch types, direction, and thread placement.
✅ It saves time and avoids wasting material during production.
In short, a well-digitized logo means your brand looks professional and high-quality every time.
Step-by-Step: How to Digitize a Logo for Embroidery
Let’s look at the simple steps on how we digitize a logo for embroidery at Embro Prints. You’ll see how the digitizing process works from start to finish.
Step 1: Get Your Logo Ready (Vector Art Preparation)
Before digitizing for embroidery, make sure your logo image is clear.
A high-resolution file (like PNG, SVG, or PDF) works best. Avoid blurry or small images. Vector artwork is ideal because it scales without losing quality.
If your logo has tiny text or thin lines, they might not stitch clearly – so we simplify them a little for embroidery optimization.
At Embro Prints, we help you clean up your logo and prepare it perfectly for the embroidery digitizing service.
Step 2: Choose Where You Want to Stitch It (Placement & Fabric Type)
Where the logo will go on a custom embroidered shirt, hat, bag, or jacket makes a big difference.
Different materials and locations need different stitch settings and stitch density.
For example:
Caps need tighter stitches and proper underlay stitches. T-shirts need lighter stitches so the fabric doesn’t wrinkle or pucker. Jackets may need thicker threads and 3D puff embroidery for visibility.
We adjust everything according to your product type and embroidery placement.
Step 3: Convert the Logo into an Embroidery File (Professional Digitizing Software)
Now comes the main part: embroidery file conversion.
Using professional digitizing software and machines, we convert your logo into a machine embroidery file.
This file contains all the important details:
Type of stitches (satin stitch, fill stitch, or running stitch) Stitch direction and stitch density Stitch sequence (which part comes first, second, etc.) Thread colors and Pantone matching
Common embroidery file formats include:
- DST (Tajima machines)
- PES (Brother, Babylock)
- JEF (Janome)
- EXP, HUS, and others
This is the “blueprint” your embroidery machine follows to create the design.
Step 4: Test the Embroidery (Quality Control & Stitch Testing)
Before final production, we always run a test stitch on similar fabric.
This helps us make sure:
✅ The logo looks correct.
✅ The thread colors are right.
✅ The text is readable.
✅ There are no gaps, overlaps, or fabric puckering.
✅ Push and pull compensation is properly applied.
If needed, we make small adjustments to perfect the design.
This step ensures that your final custom logo embroidery comes out clean and professional.
Step 5: Final Embroidery Production (Commercial Embroidery Services)
Once the test looks good, we move to full production.
Our high-quality embroidery machines start stitching your logo onto the actual fabric.
We use strong embroidery threads and precise settings so your embroidery design is durable, neat, and long-lasting.
After stitching, the product is trimmed, cleaned, and ready for delivery.
That’s it your digital logo is now a real embroidered design!
What Is the Process of Digitizing?
If you’re wondering, what is the process of digitizing? – it’s simple.
It’s the step where your flat image is turned into a 3D stitched design.
Here’s a short version of the digitizing process:
- Import the logo into the embroidery software.
- Trace each part of the design using vector outlines.
- Assign stitch types (running, satin, fill) and directions.
- Adjust the density, size, and color.
- Add underlay stitches for stability.
- Save it in a machine-readable format (like DST, PES, or JEF).
- Test stitch and finalize.
At Embro Prints, we take care of all of this – so you don’t have to worry about the technical part.
How Do I Turn an Image Into an Embroidery File?
You can’t just use a normal photo or logo for machine embroidery.
To turn an image into an embroidery file, it must be digitized using special digitizing software.
If you try to upload a regular JPG or PNG file to an embroidery machine, it won’t work.
You need a .DST, .PES, or other embroidery file formats that tell the machine how to stitch.
So, the short answer is: You can send your image to a professional embroidery digitizer like Embro Prints, and we’ll digitize it for you.
What Format Does a Logo Need to Be in for Embroidery?
Embroidery machines use special formats.
Here are some of the most common embroidery file formats:
- DST (Tajima machines)
- PES (Brother, Babylock)
- JEF (Janome)
- EXP, HUS, VIP, and others
You don’t have to worry about choosing the format yourself – at Embro Prints, we’ll handle it for you and make sure it’s ready for your commercial embroidery machine or home embroidery machine.
How Can I Digitize My Logo for Embroidery?
If you’re asking, how can I digitize my logo for embroidery? there are two ways:
- DIY approach: Do it yourself using digitizing software and an embroidery machine (this takes practice and knowledge of stitch types, fabric types, and embroidery techniques).
- Professional service: Use a professional embroidery digitizing service like Embro Prints, where we handle the full process – artwork cleanup, logo digitizing, test stitching, and production.
Most people choose the second option because embroidery digitizing requires experience, proper commercial embroidery machines, and understanding of stitch density, pull compensation, and thread tension.
Is Embroidery Digitizing Hard to Learn?
Embroidery digitizing may sound easy, but it takes skill and practice.
You have to understand:
Stitch types (running stitch, satin stitch, fill stitch) How stitches behave on different fabric types What underlay stitches to use How to keep the design balanced and prevent fabric distortion Thread color matching and Pantone thread colors
If you’re new to machine embroidery, it can take months to learn and practice properly.
That’s why many businesses and individuals prefer to let professional digitizers like Embro Prints handle it.
We already have professional embroidery machines, trained digitizers, and the experience to make your design look perfect on fabric.
How Much Does It Cost to Digitize a Logo?
This is one of the most common questions people ask: How much does it cost to digitize a logo for embroidery?
The cost depends on:
The size of your logo (left chest, full back, cap front)
The number of stitches (stitch count)
The complexity of the design (simple vs. detailed)
The number of thread colors Turnaround time (rush orders cost more)
Simple logos can be digitized for a low price, while more detailed designs may cost a bit more.
At Embro Prints, we offer affordable embroidery digitizing and for large or repeat orders, we often include digitizing free of cost.
You can contact us anytime, send your logo, and we’ll give you a quick quote for your custom embroidery project.
Common Mistakes to Avoid When Digitizing
Even though digitizing sounds simple, small mistakes can ruin your embroidery quality.
Here are a few things to avoid:
❌ Using low-quality images – blurry logos cause messy stitches.
❌ Ignoring fabric type – different fabrics need different backing materials and settings.
❌ Skipping test stitching – always test before full production.
❌ Too much detail – simplify designs for small embroidery areas.
❌ Using wrong thread tension – causes gaps or loose stitches.
❌ Not using proper underlay stitches – leads to fabric puckering.
At Embro Prints, we test and adjust everything before production to make sure your custom logo embroidery looks perfect.
Tips for Perfect Logo Embroidery
Here are a few helpful tips if you want your embroidered logo to look clean and professional:
✅ Use bold fonts and simple shapes.
✅ Avoid too many tiny details.
✅ Choose the right embroidery size for your logo.
✅ Use fewer colors for a neat, smooth result.
✅ Work with professional embroidery services who know the machines and fabrics.
✅ Consider 3D puff embroidery for hats and caps.
✅ Use quality embroidery backing for stability.
These small steps make a big difference in the final stitched product.
Understanding Embroidery Terminology
Satin Stitch: Used for borders, outlines, and lettering. Creates a smooth, shiny finish.
Fill Stitch: Used for large areas. Creates solid coverage with rows of stitches.
Running Stitch: Simple stitch used for outlines and fine details.
Underlay Stitch: Foundation stitches placed first to stabilize fabric and prevent distortion.
Stitch Density: How close stitches are placed together. Too dense causes puckering; too light causes gaps.
Push and Pull Compensation: Adjustments made to counteract fabric distortion during stitching.
Backing Material: Stabilizer placed under fabric during embroidery for support.
Stitch Count: Total number of stitches in a design. Affects pricing and production time.
Best Practices for Different Fabric Types
Cotton T-Shirts: Use medium-weight backing, moderate stitch density, avoid over-digitizing.
Polo Shirts: Similar to t-shirts but can handle slightly denser stitches.
Caps/Hats: Require cap backing, tighter stitches, and proper stitch angles for curved surfaces.
Jackets: Use heavy-duty backing, can handle dense stitches and 3D puff foam.
Towels: Need water-soluble topping and longer stitches to penetrate pile fabric.
Leather: Requires minimal stitching, special needles, and careful tension adjustment.
Fleece/Knits: Use stretch backing and avoid dense fills that cause fabric distortion.
Why Choose Embro Prints for Logo Digitizing
When it comes to logo embroidery and digitizing, Embro Prints is your trusted partner.
We don’t just digitize, we bring your design to life with top-quality stitching.
Here’s why customers love working with us:
✅ Professional digitizing and embroidery under one roof.
✅ Skilled team with years of experience in commercial embroidery.
✅ High-quality embroidery machines (Tajima, Brother, Barudan) and premium threads.
✅ Quick turnaround and affordable pricing.
✅ Free quotes and friendly customer service.
✅ Free digitizing on bulk orders.
✅ Support for all embroidery file formats.
✅ Test stitching before production.
Whether you need one logo embroidered or a full batch of company uniforms, corporate apparel, or promotional items, Embro Prints delivers perfection in every stitch.
FAQs
1. How do I digitize a logo for embroidery?
You send your logo to a professional digitizer (like Embro Prints).
2. How much does it cost to digitize a logo?
It depends on design size, stitch count, and complexity.
3. How do I turn an image into an embroidery file?
You can’t use a normal image file like JPG or PNG directly.
4. What format does a logo need to be in for embroidery?
Embroidery machines use formats like DST (Tajima), PES (Brother), JEF (Janome), EXP (Melco), and HUS (Husqvarna Viking).
5. What is the process of digitizing?
It’s converting your logo into a machine embroidery file that tells the embroidery machine how to stitch.
6. How can I digitize my logo for embroidery?
You can try with digitizing software (like Wilcom, Pulse, or free options like Ink/Stitch)
7. Is embroidery digitizing hard to learn?
Yes, embroidery digitizing takes time to master.
8. What file types can I send for digitizing?
We accept PNG, JPG, PDF, SVG, AI (Adobe Illustrator), EPS, and CDR (CorelDRAW) files. Vector files (SVG, AI, EPS) work best because they scale without quality loss.
9. How long does digitizing take?
Standard turnaround time is 24-48 hours for simple logos. Complex designs may take 2-3 business days. We also offer rush digitizing services for urgent orders – usually within 12-24 hours.
10. Can you digitize any logo?
Yes! We can digitize almost any logo or design.
11. Do you offer revisions?
Yes! We offer unlimited revisions until you’re 100% satisfied with the digitized file and test stitch result. Your satisfaction is our priority.
Final Thoughts
Digitizing a logo for embroidery may sound technical, but it’s simply the process of preparing your design so the embroidery machine can stitch it beautifully.
From logo preparation to test stitching and final embroidery production – every step matters.
At Embro Prints, we take care of everything for you.
Whether you need business logos, company uniforms, custom embroidered shirts, hat embroidery, or personalized gifts, our expert team will make sure your embroidery stands out with clean, professional stitching.